
I’m most interested in easy recipes that look impressive. My interaction with bread making was limited to using my sister’s bread machine back when I was in college. But in 2009, my life changed when I head about a new cookbook – Jim Lahey’s My Bread: The Revolutionary No-Work, No-Knead Method. He made bread so accessible and easy that it was my entry into making many different kinds of bread.
Bread making requires you to get 2 ingredients you don’t typically keep – bread flour and yeast, but the wonderful thing about this recipe is that it replaces special equipment or hard work with time. Instead of kneading dough to form the elastic bonds of gluten, a highly hydrated dough can do that same thing, but better, just by sitting for 12-18 hours.
There are limits to what you can make with this method. For example, you can’t do dough with milk, butter, or eggs. But it is so easy to produce great tasting artisan bread with so little effort, you’ll be hooked.
In a professional bakery, the ovens are able to inject steam into it during the baking process. For this recipe, you’ll recreate that moisture level by baking the bread in something with a lid. That could be an 4.5 to 5.5-quart enameled dutch oven, a cast iron dutch oven, or what I like to use – a 10″-11″ diameter ceramic hot pot, typically used in Asian cooking.
Basic No-Knead Bread Recipe
3 cups bread flour
1 1/4 tsp. salt
1/4 tsp. active dry yeast
1 1/3 cups cool water


Wisk together flour, salt and yeast. Add water and mix with a wooden or silicone spoon until you have a wet, sticky dough. Cover the bowl and let it sit until doubled in size – 12 to 18 hours.
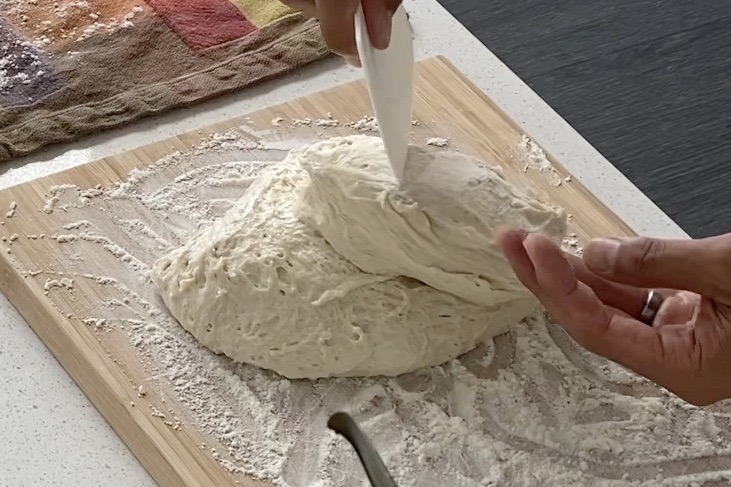
Generously (I can’t emphasize this enough) dust a cutting board with flour and scoop out the dough in one piece. It will be very loose and sticky, but don’t add any extra flour. Just use enough flour to keep it from sticking to the work surface and your hands. Fold in the sides towards the center and form a nice round ball of dough.
From here you can follow the recipe to make a boule. Or you can do a variation and form it another way.
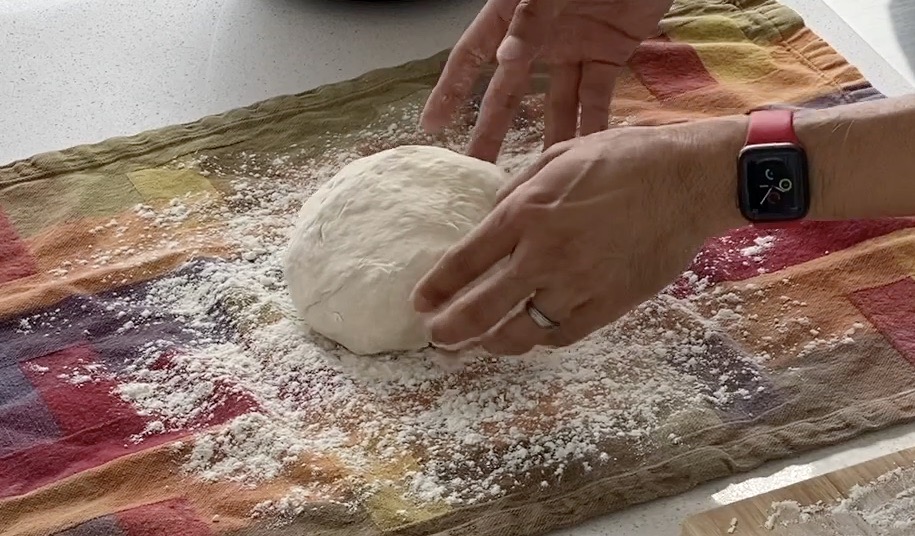
Generously (emphasis again) dust a cotton or linen tea towel or napkin with what bran, cornmeal or flour and place the dough ball seam side down. Do NOT use terry cloth – it will stick to the towel. Dust the top of the dough as well and fold the towel loosely over the dough and let it rest for 1 hour.
30 minutes before that 1 hour rise is complete, preheat the oven with the pot and lid inside to 475ºF.
Carefully remove the preheated pot and uncover. Lift the dough up and carefully flip the dough into the pot; now that seam side is on the top and that will give you some beautiful cracks when it bakes. Cover and bake 30 minutes.
Remove the lid and continue baking until bread is a beautiful dark brown, 10-20 minutes. Carefully lift the bread out of the pot and cool on a rack. You should begin to hear the bread “sing” as the crust hardens and the moisture inside tries to escape. Don’t cut the bread until it has fully cooled!
Variations:
1. Cut them into 24 pieces and roll them into smooth balls. Either place together in a 9×13 pan or separately on a cookie sheet. Let rise for 30 minutes to an hour. Bake at 375ºF for about 15 minutes until a medium brown. Put a wash on top if you want: egg white with 1 T. milk for golden brown color with shine; whole milk for a crisp matte brown; whole egg for a dark brown; egg yolk for a strong golden-yellow; egg white for just a shine.
2. Pan co’ Santi is an Italian holiday bread with raisins and walnuts (although I prefer to do my Americanized version with raisins and pecans). Instructions are the same. Ingredients are 3 cups bread flour; 1/2 cup raisins; 1/2 cup chopped walnuts; 1 1/4 tsp salt; 3/4 tsp cinnamon; 1/2 tsp active dry yeast; a pinch of ground black pepper; and 1 1/2 cups cool water.
